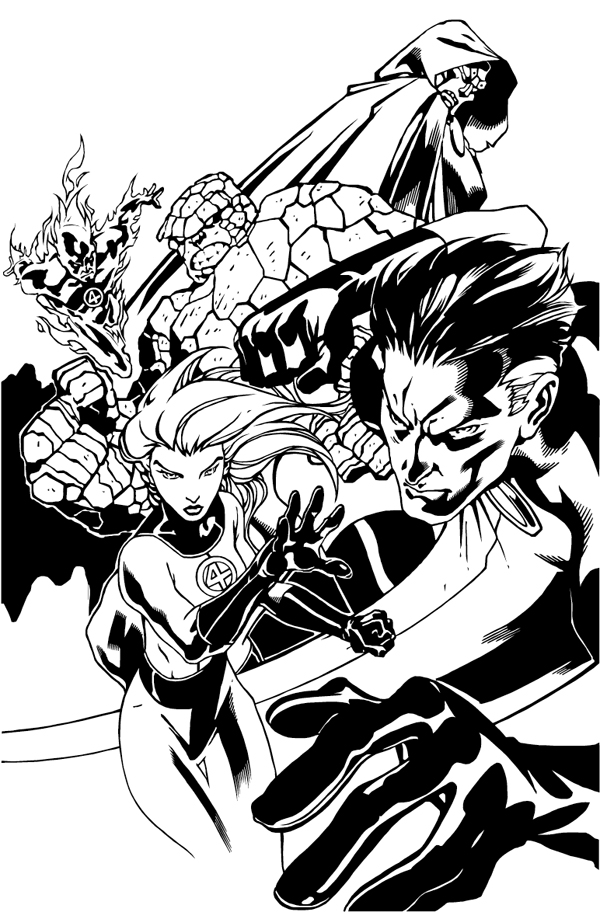
Comic Book Digital Inking with Adobe Illustrator
Here is a digitally inked Pinup of an awesome penciled piece of the Fantastic Four by artist Ariel Padilla. I found the pencils on his DeviantArt page and I knew I had to ink it. I used Adobe Illustrator so I could create a vector image. This way it can be reduced or enlarged with no pixelation of the image. This is actually my second piece digitally inked but the first I’ve done in Illustrator. My Batman 2.0 character redesign was my first digitally inked piece but for that I used Photoshop. I have used Illustrator in the past to create illustrations, logos, advertisements, and marketing but this was the first time I incorporated my graphic design skills into inking.
I have a Wacom tablet but for this digital inking, I used only my mouse and the pen tool. So basically the piece is all straight vector anchor points. This illustration took about 5 hours, which is longer than I thought it would, but it was fun and a nice practice piece. On my next Illustrator ink, I plan on using the Wacom tablet and the brush tool. Right now it is all about having fun and learning to use the tools I use in my graphic design work in my comic book artwork. My next step will be to create flats for these inks and maybe color them too.
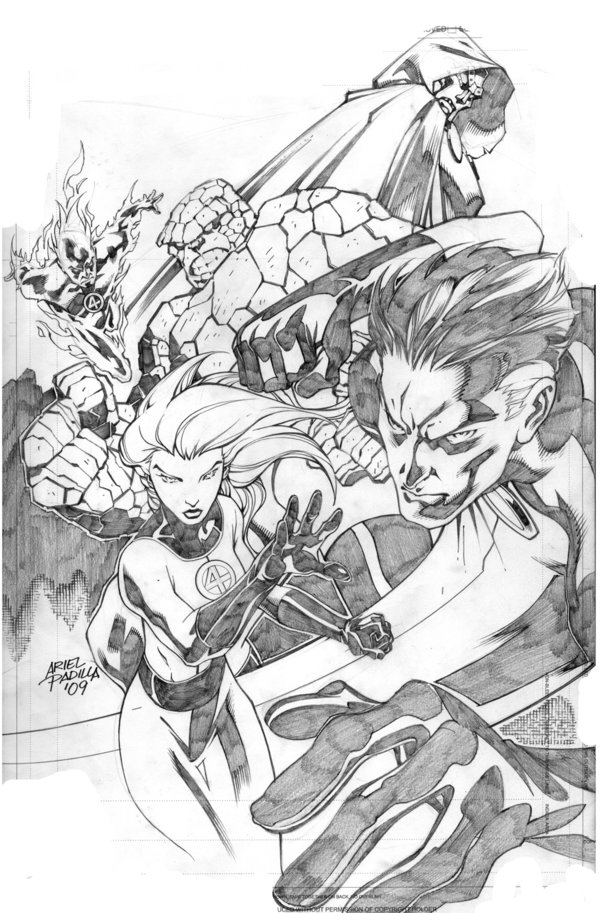
Here are the original pencils by Ariel Padilla.
Want to see the steps I took to create the digital inking? Check out my blog post: Comic Book Digital Inking Techniques with Illustrator Vector Anchor Points
This blog post was originally published on my former website, Comic Book Graphic Design and has now been migrated here to RSC Arts, Artist Blog.

Looks great — any way you can post a screen capture of the illustration in Outline? I’d like to see how you put it together.
Hey Bram. Thanks for checking out the post. In response to your comment, I have made a new blog post that shows some of the steps I used when digitally inking this Fantastic Four Pin-Up using anchor points and paths in Adobe Illustrator. Check it out.
This is sweet!
Thanks Dennis!